Android eSIM setup guide
To install your A1 eSIM on an Android device, simply follow the steps below.
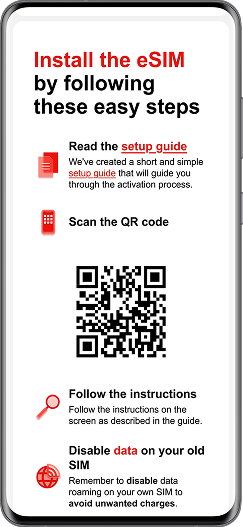
Open the email with your eSIM activation info and screenshot the QR code.
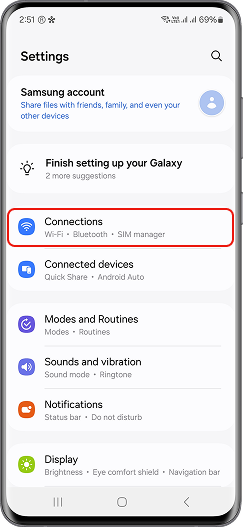
Open Settings and tap on Connections.
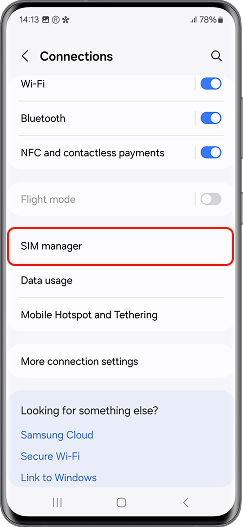
Tap SIM manager.
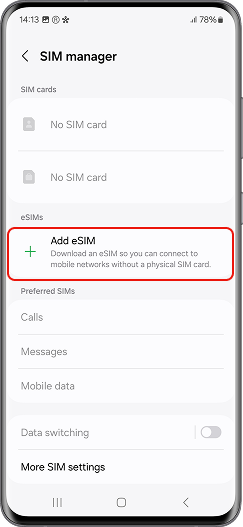
Select Add eSIM.

Set your new eSIM as the preferred SIM for calls, messages, and data.
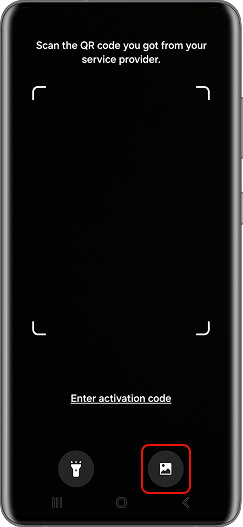
Choose the QR code from your photo gallery or scan it from the email on another device.
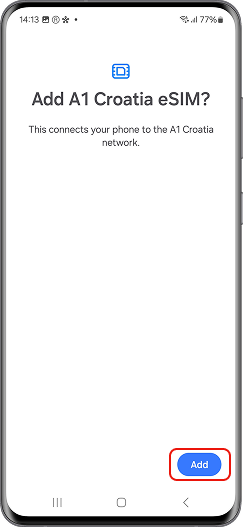
Tap Add, wait for the eSIM to install, and enter the PIN provided in the email.
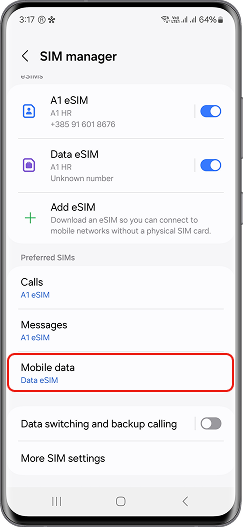
Set your new eSIM as the preferred SIM for calls, messages, and data.
iPhone eSIM setup guide
If you are installing the eSIM on the same device where you received the QR code, follow "From Email" instructions. If you want to install it on a different device, use "Scanning the QR Code" instructions.
From email
Open the email with your eSIM activation info and long press the QR code.
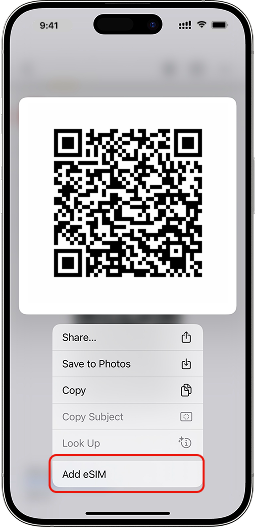
Tap Add eSIM.
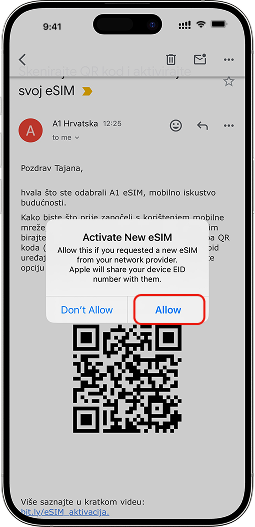
Tap Allow
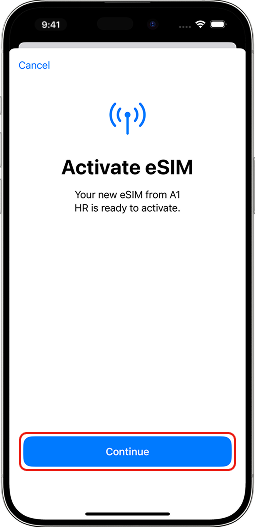
Your new eSIM is ready to activate, press Continue
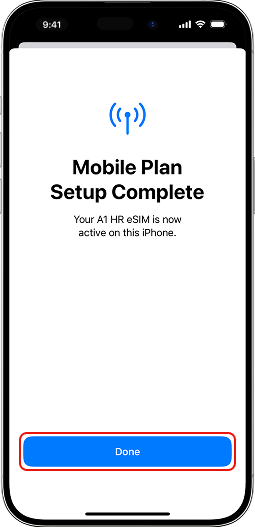
Tap Done. Activation of the eSIM completed!

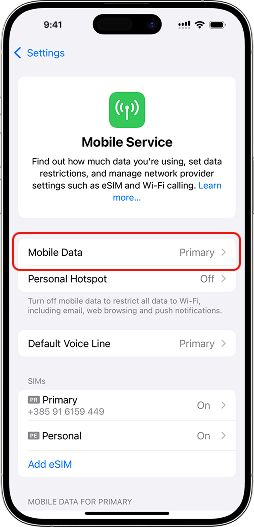
Set your new eSIM for Mobile Data
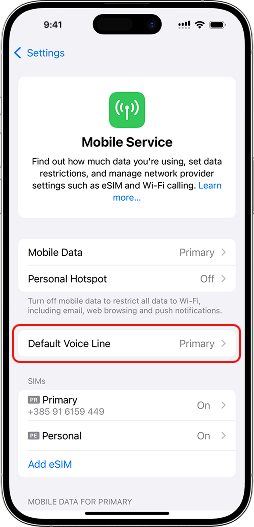
You can change your default SIM for calls and messages anytime in your settings.
Scanning the QR code
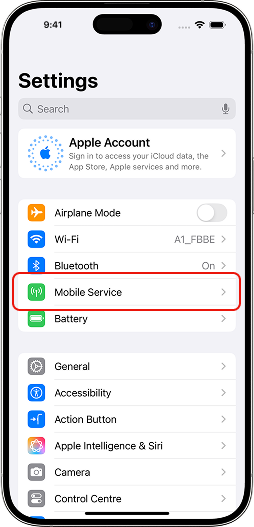
Go to Settings and tap Mobile services.
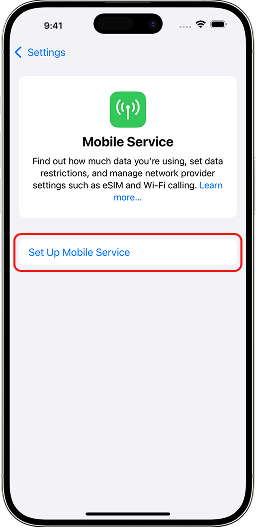
Tap Set Up Mobile Services.
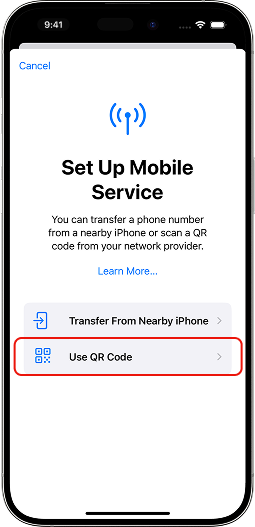
Tap Use QR Code and scan the QR code you have received.

After scanning the QR code, activate the eSIM by pressing Continue.

Tap Done. Activation of the eSIM completed!
Set your new eSIM for Mobile Data

You can change your default SIM for calls and messages anytime in your settings.